

What is an Email Blacklist?
An email blacklist (also called a blocklist or DNS-based blackhole list) is essentially a database of IP addresses and domains that have been flagged as sources of spam or malicious content. Think of it like a bouncer at an exclusive club – they have a list of troublemakers who aren’t allowed in, and if your name’s on that list, you’re not getting through the door.
These blacklists are maintained by independent organizations and are consulted by Internet Service Providers (ISPs) and major Email Service Providers like Google and Microsoft. When you send an email, the recipient’s server quickly checks these lists during the initial connection process. If your IP address or domain appears on a blacklist, your email might be:
- Rejected outright (bounced back)
- Delivered to the spam folder
- Accepted but flagged for future filtering
It’s important to understand that blacklists themselves don’t block emails – they simply provide data that email providers use to make filtering decisions. Your primary relationship is actually with the major mailbox providers, and a clean blacklist record helps maintain that positive reputation.
Types of Email Blacklists
There are two main types of email blacklists you should know about:
IP-Based Blacklists: These target the specific Internet Protocol (IP) address of your email server. Since every device connected to the internet has a unique IP address, this serves as the primary identifier for tracking sending behavior.
Domain-Based Blacklists: These more sophisticated lists target your actual domain name (like yourcompany.com) or domains found in your email content. Domain blacklisting is often more serious because changing domains is much more costly and disruptive than switching IP addresses.
How Does an Email Blacklist Work?
Understanding the mechanics behind email blacklists helps you see why they exist and how to work within the system rather than against it.
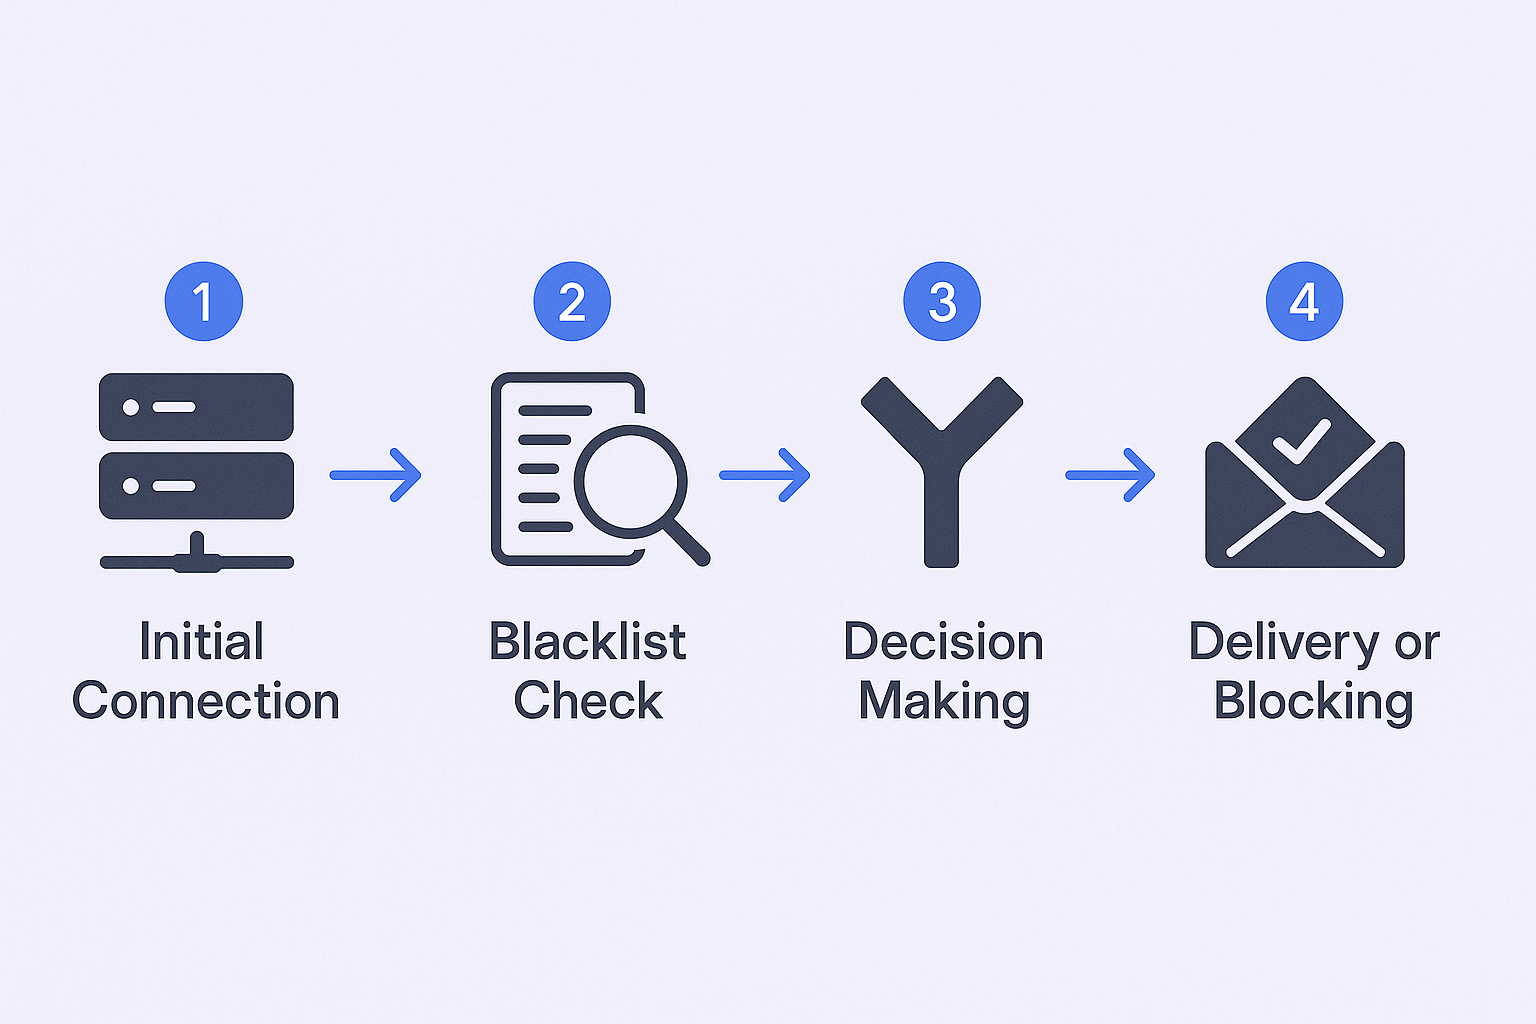
When you hit “send” on an email, here’s what happens behind the scenes:
- Initial Connection: Your email server attempts to connect with the recipient’s server through what’s called an SMTP handshake
- Blacklist Check: The receiving server immediately queries the blacklists it subscribes to in real-time
- Decision Making: Based on the blacklist results and other factors, the server decides whether to accept, reject, or filter your email
- Delivery or Blocking: Your email either reaches the inbox, gets sent to spam, or bounces back with an error message
This entire process happens in seconds, which is why blacklist listings can have such an immediate and dramatic impact on your email deliverability.
Major Blacklist Providers
Several key organizations maintain the most influential blacklists:
Spamhaus: The most widely used and respected blacklist operator. A listing on Spamhaus can reduce email delivery by over 60%. They maintain specialized lists including the Spamhaus Block List (SBL) for verified spam sources and the Exploits Block List (XBL) for compromised systems.
Barracuda Reputation Block List (BRBL): A free, automated system that filters hundreds of millions of spam emails daily. It focuses on identifying senders with poor configurations or spam-like behavior patterns.
SpamCop: Operates on user-generated spam reports. An IP gets listed after receiving a certain volume of complaints, making it a direct measure of recipient dissatisfaction.
How to Find Out Whether You Are Blacklisted or Not
Detecting a blacklist issue early can save you weeks of frustration and lost opportunities. Here are the three most reliable methods to check your status:
Monitor Your Email Performance Metrics
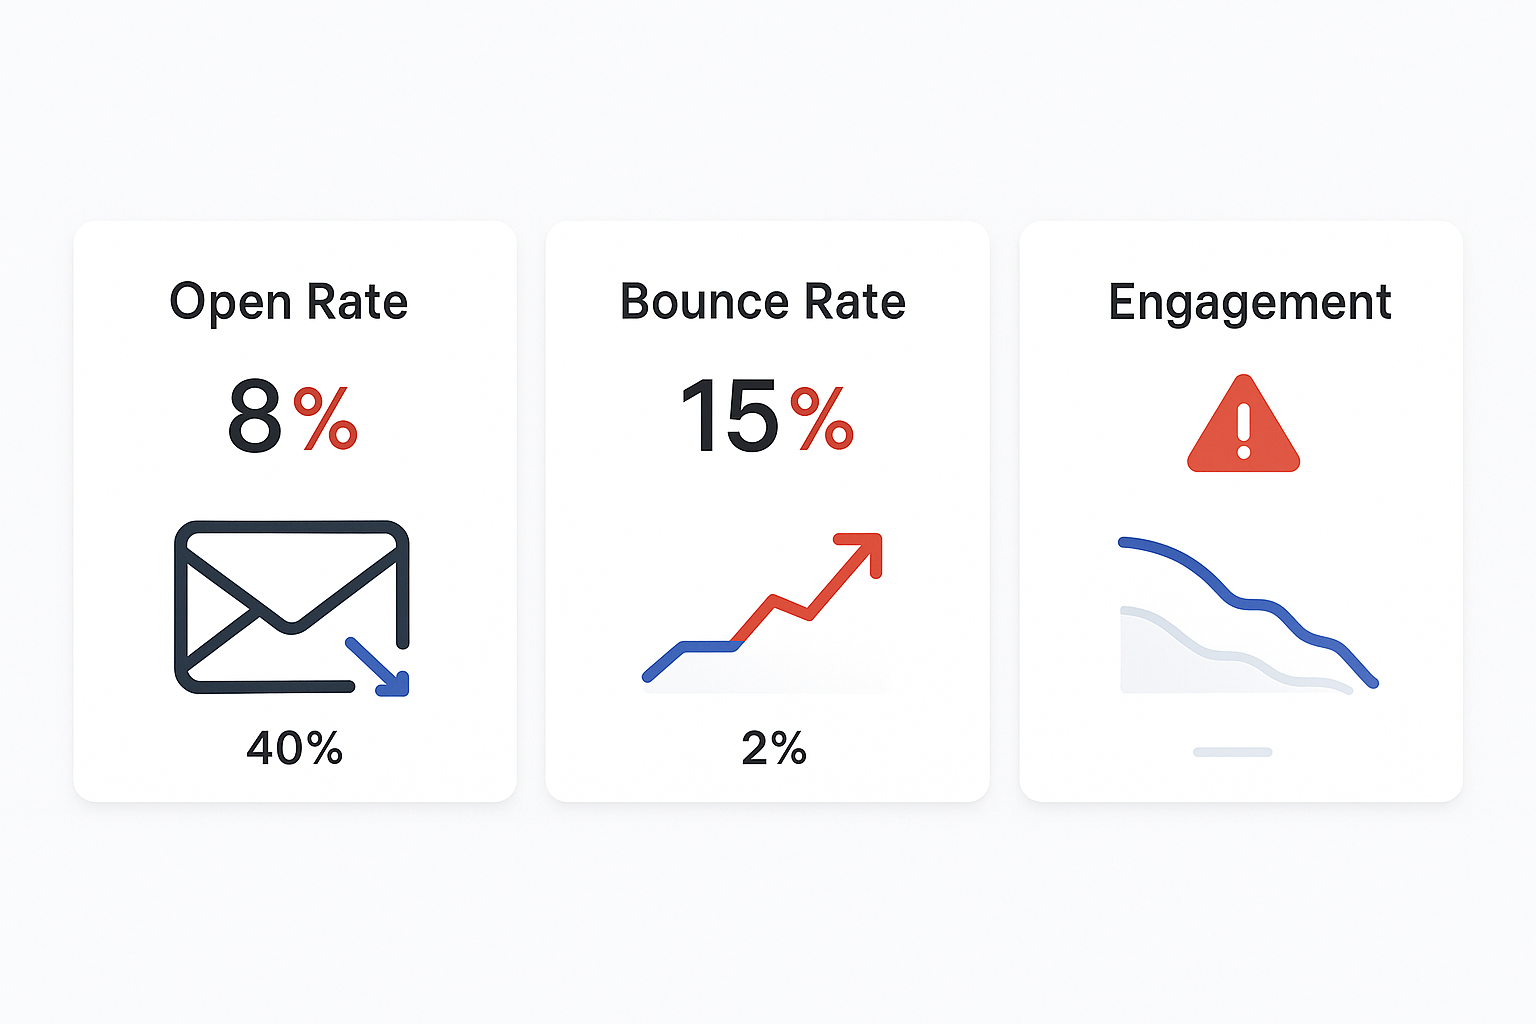
The first warning signs usually appear in your campaign analytics:
Sudden Drop in Open Rates: If your typical 40% open rate suddenly plummets to 5-10%, it’s a strong indicator that emails are being filtered or blocked entirely.
Increased Bounce Rates: A spike in hard bounces, especially with error messages mentioning specific blacklists (like “Service unavailable; Client host blocked using Spamhaus”), is a clear red flag.
Declining Engagement: Corresponding drops in reply rates and click-through rates naturally follow when emails aren’t reaching their destination.
Healthy email benchmarks to watch for:
- Open rates: 25-50%
- Bounce rate: Under 3%
- Spam complaint rate: Under 0.1% (1 per 1,000 emails)
Use Free Blacklist Checker Tools
Several reliable tools can check your IP address or domain against 100+ blacklists simultaneously:
MXToolbox: The most popular comprehensive checker. Simply enter your IP address or domain to get a detailed report showing which blacklists (if any) have you listed.
MultiRBL.valli.org: A free service offering comprehensive checks against a large number of blocklists.
Spamhaus Project Checker: Check directly against Spamhaus’s influential databases.
DNSBL.info: Focused specifically on DNS blacklist checking.
To use these tools, you’ll need your sending IP address, which you can usually find in your email service provider’s settings or by checking your email headers.
Send Test Emails
A practical diagnostic method is sending test emails to accounts you control across different providers (Gmail, Outlook, Yahoo). If your emails consistently land in spam folders or aren’t delivered at all, it strongly suggests a reputation or blacklisting issue.
How to Get Out of Blacklists
Once you’ve confirmed a blacklist listing, follow this systematic recovery protocol. Simply requesting removal without addressing the root cause will likely result in denial or rapid re-listing.
Stop All Sending and Investigate
Immediately pause all outbound email campaigns from the affected IP address and domain. Continuing to send will only worsen your reputation and make removal more difficult.
Next, conduct a thorough investigation to identify what caused the listing:
- Review recent campaigns for new list sources, content changes, or volume spikes
- Check all systems for malware or security compromises
- Analyze bounce logs and error messages for specific blacklist mentions
- Examine your email authentication settings (SPF, DKIM, DMARC)
Fix the Root Cause
Blacklist operators won’t consider removal until they’re convinced you’ve addressed the underlying problem:
Clean Your Email List: Use an email verification tool to remove invalid, bounced, and unengaged addresses. If purchased lists were involved, delete them entirely.
Review Content and Practices: Remove spam trigger words, misleading subject lines, and aggressive formatting. Ensure every email has a clear, functional unsubscribe link.
Secure Your Systems: Change passwords, enable two-factor authentication, and scan for malware if security was compromised.
Verify Authentication: Ensure your SPF, DKIM, and DMARC records are properly configured and validated.
Submit a Professional Delisting Request
Each blacklist has specific removal procedures, typically found on their websites. Your request should be professional and include:
- Clear acknowledgment of the issue and brief explanation of the cause
- Evidence of remediation with specific steps taken to fix the problem
- Commitment to best practices and measures to prevent recurrence
For Spamhaus: Most removal requests must go through your Internet Service Provider’s abuse desk, though some lists allow direct removal requests through their tools.
For Barracuda: They provide a dedicated online removal form and typically process valid requests within 12-24 hours.
Monitor and Re-Warm Your Domain
After submitting removal requests, continue monitoring your blacklist status. Delisting can take anywhere from a few hours to several days.
Don’t immediately resume high-volume sending once delisted. Your domain’s reputation has been damaged and needs rebuilding. Start with a “re-warming” process:
- Begin with very low volume (10-20 emails per day)
- Send only to your most engaged contacts initially
- Gradually increase volume over several weeks
- Monitor metrics closely to ensure positive reputation recovery
Steps to Stay Away from Getting Blacklisted
Prevention is always easier than recovery. These proven strategies will help you maintain excellent email deliverability and avoid blacklist issues entirely.
Master Email List Hygiene
Your email list quality is the foundation of deliverability success:
Never Buy Email Lists: This is the cardinal rule. Purchased lists are notoriously inaccurate and often contain spam traps, outdated addresses, and non-consenting recipients. Research shows that sending to purchased lists is the #1 cause of hitting spam traps.
Implement Email Verification: Use real-time verification services to validate addresses at the point of capture and regularly clean your existing database. This prevents invalid and risky addresses from causing bounces.
Practice Sunset Policies: Regularly remove chronically inactive subscribers. Sending to users who never engage lowers overall engagement rates and increases the risk of hitting recycled spam traps.
Use Double Opt-In: For marketing lists, require users to confirm their subscription via email. This guarantees the address is valid and the owner has given explicit consent.
Create High-Quality, Personalized Content
The content and approach of your emails directly influences whether recipients see them as valuable or spam:
Personalize Beyond Names: Go deeper than [First Name] mail merges. Reference specific pain points, company news, or industry challenges relevant to each recipient.
Provide Genuine Value: Every email should offer something useful – insights, statistics, solutions, or resources that help the recipient even if they don’t buy from you.
Avoid Spam Triggers: Steer clear of overly salesy language (“free,” “guarantee,” “act now”), excessive punctuation, ALL CAPS text, and poorly formatted HTML.
Follow Smart Sending Practices
How and when you send emails is just as important as what you send:
Warm Up New Infrastructure: All new domains and IP addresses must be warmed up gradually. Start with 10-20 emails per day to highly engaged contacts and slowly increase volume based on performance metrics.
Maintain Consistent Volume: Avoid large, erratic spikes in sending volume. ISPs favor steady, predictable sending schedules over irregular bursts.
Respect Sending Limits: Keep daily email volume reasonable (typically under 100-200 for cold outreach) to avoid triggering automated blocks. Use random time intervals between sends rather than fixed schedules.
Make Unsubscribing Easy: Every email must contain a clear, one-click unsubscribe link. Hiding this option or requiring login to opt-out encourages spam complaints.
Configure Proper Email Authentication
Set up these three critical authentication protocols:
SPF (Sender Policy Framework): Specifies which servers are authorized to send email from your domain. Think of it as a guest list for your domain’s email.
DKIM (DomainKeys Identified Mail): Adds a digital signature to verify your emails haven’t been tampered with in transit. It’s like a tamper-proof seal on each message.
DMARC (Domain-based Message Authentication): Builds on SPF and DKIM to tell receiving servers what to do with emails that fail authentication checks. Implementing DMARC significantly boosts sender reputation as it shows you take email security seriously.
Monitor Your Reputation Continuously
Check blacklist status monthly using the tools mentioned earlier. Set up monitoring alerts if available, and keep an eye on your email metrics for any sudden changes that might indicate reputation issues.
Track key metrics:
- Maintain open rates above 25%
- Keep bounce rates under 3%
- Monitor spam complaint rates (should be under 0.1%)
- Watch for delivery rate changes
Additional Prevention Strategies
Work with Reputable Email Service Providers
Choose ESPs with strong reputations and robust infrastructure. They often provide:
- Shared IP pools with good reputations
- Automated bounce handling
- Built-in authentication setup
- Delivery monitoring and alerts
Segment Your Audience Effectively
Segmentation improves engagement rates by up to 760%. Send more targeted, relevant emails to specific groups rather than broad blasts to your entire list. Higher engagement signals to ISPs that your content is wanted.
Implement Feedback Loops
Many ISPs offer feedback loops that notify you when recipients mark your emails as spam. This allows you to immediately remove complainers from your lists and identify content issues.
Stay Updated on Industry Changes
Email deliverability best practices evolve constantly. Major providers like Google and Yahoo regularly update their filtering algorithms and requirements. Stay informed through industry blogs, newsletters, and provider announcements.
What to Do If Prevention Fails
Despite best efforts, blacklist issues can still occur. If you find yourself listed:
- Don’t panic – most listings are temporary and removable
- Follow the recovery protocol outlined above systematically
- Learn from the experience to prevent future issues
- Consider professional help if dealing with severe or repeated listings
Remember that 64.6% of businesses have experienced direct negative impact on revenue due to deliverability issues. Taking blacklist prevention seriously protects both your immediate campaigns and long-term business relationships.
